


Amazon API Gateway is a fully managed AWS service that helps developers to create HTTP and Rest APIs. The APIs will be at the front door before the request goes into our backend business services. It is very critical to secure our APIs.
In this blog post, we will see how to add authorization of JWT(JSON Web Tokens) type to the API Gateway Routes using auth0 as an Identity Provider.
Create API in auth0
We need to login into the auth0 tenant dashboard and register an API.
Go to Dashboard > Applications > APIs, and select + Create API.
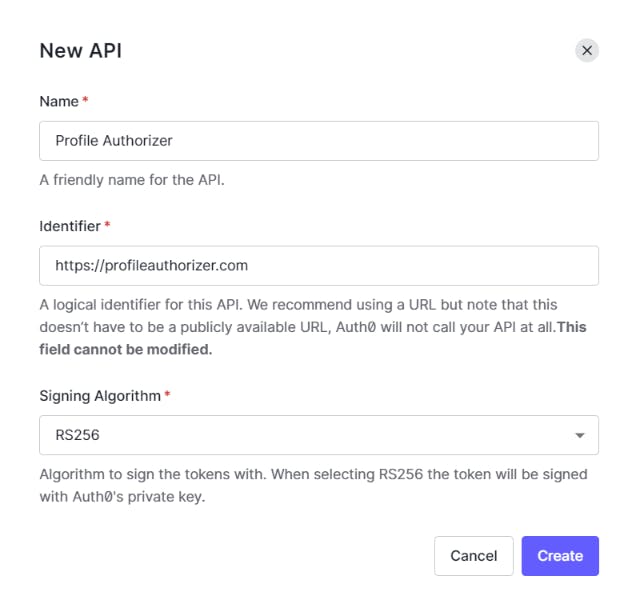
Give a name for the API Profile Authorizer, a unique identifier for the API profileauthorizer.com, and the algorithm to sign the tokens RS256 as shown above.
Create AWS API Gateway Endpoint
Login to AWS console and go to AWS APIGateway service and create an HTTP API with a name hashigate-aws-api and create a Route with /profile as Resource and GET method. We will integrate the Gateway with the Lambda function so that, whenever the request comes to Gateway, it goes into lambda and gives us the random profiles as output.

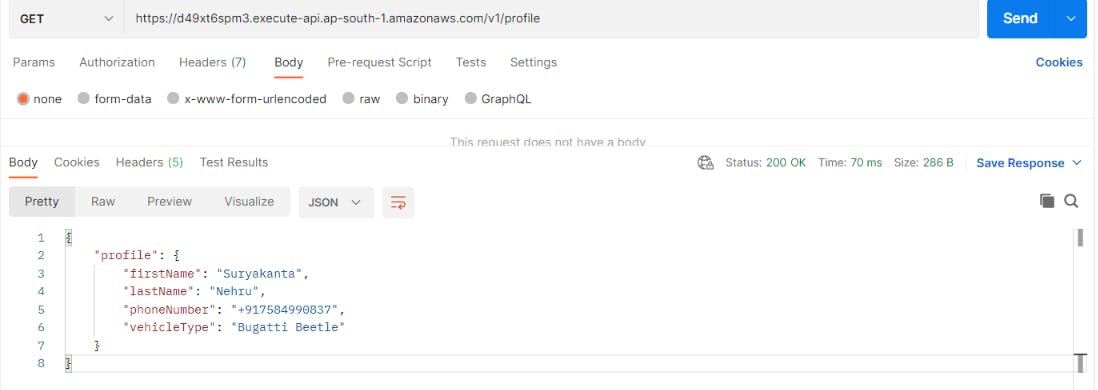
Now, go to the postman and send the request, we see the below output.
Add Authorizer to the Route
Now, let us add the JWT authorization to the Route. Go to the Authorization and click on Create and Attach an authorizer and select the JWT as Authorizer Type and give the name as profile_auth
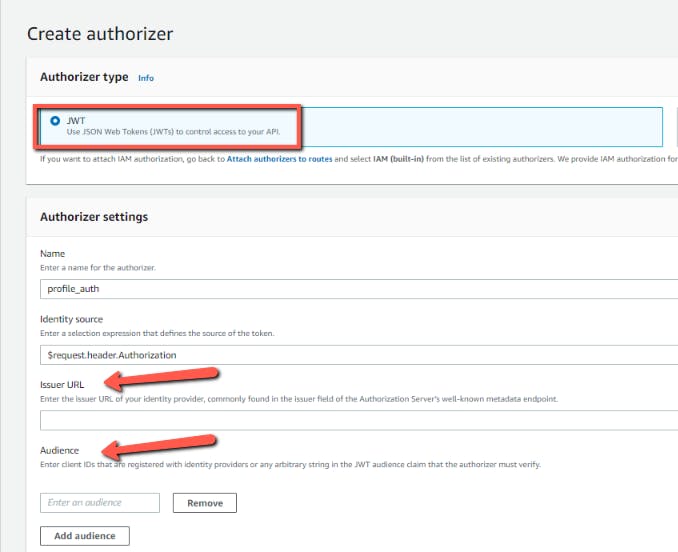
We need an Issuer URL of the Identity Provider (In this case auth0) and the audience which is the client ID that is registered to the Identity Provider.
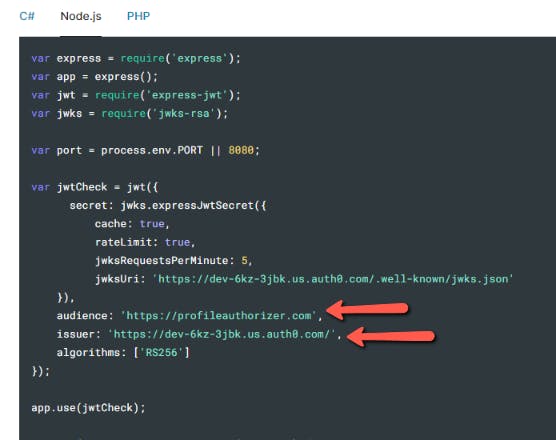
To get the value, head over to the API Profile Authorizer which was created in the auth0 dashboard. In Quick Start, you will find a nodejs code and we can see the value for issuer and audience.
Now, once the authorizer is created, we can attach the authorizer to our Route /profile and deploy.

Now, go to the postman and send the request. Now, we see the message Unauthorized

To get to the bearer token, head over to the API Profile Authorizer which was created in the auth0 dashboard. In Test, you will find the bearer token.

Now add the bearer token into the postman request and we see the request is authorized and we get a proper response.

Conclusion
In this blog post, we looked at how to use the auth0 API as an Issuer of Identity provider and audience. We have seen, how to create secure AWS API Gateway routes using JWT authorizer.