Serverless Event Scheduling with AWS EventBridge and Lambda using Terraform and Localstack

I am a Lead Engineer from India. Love to blog about serverless and help teams design and develop serverless architecture. An AWS cloud practitioner. Blogs about AWS Services utilising AWS CDK, CloudFormation, Terraform.
Introduction
In modern cloud development, infrastructure-as-code has become a crucial practice. Tools like Terraform enable developers and operations teams to define and manage their infrastructure in a declarative manner. However, provisioning and testing infrastructure in a live AWS environment can be time-consuming and costly. That's where LocalStack comes in. LocalStack provides a local development environment that emulates various AWS services, allowing developers to create and test AWS resources locally. In this blog post, we'll explore how to leverage Terraform and LocalStack together for local development and testing of AWS infrastructure.
What is LocalStack?
LocalStack is an open-source development tool that provides a local environment for emulating various AWS services. It allows developers to create and test AWS resources locally, without the need for a live AWS account or incurring any costs. With LocalStack, you can emulate services such as AWS Lambda, S3, DynamoDB, SQS, SNS, EventBridge, and many more.
Getting Started with LocalStack
To get started with LocalStack, follow these steps to install and set it up on your local development machine:
Prerequisites: Ensure that you have Docker installed on your machine. LocalStack runs inside a Docker container, so having Docker installed is a requirement.
Install LocalStack: Open your terminal or command prompt and run the following command. We are installing Localstack CLI, but there are multiple ways to install
localstack. Check the official guide https://docs.localstack.cloud/getting-started/installation/#localstack-clipython -m pip install localstackStart LocalStack: To start LocalStack with the default configuration, run the following command in your terminal:
localstack start
Getting Started with Terraform
Terraform is a powerful infrastructure-as-code tool that allows you to define and manage your infrastructure using declarative configuration files. In this section, we'll guide you through the process of installing Terraform and writing Terraform configuration files to manage your AWS infrastructure.
Installing Terraform
To get started with Terraform, follow these steps to install it on your local development machine:
Download and Install Terraform: Visit the official Terraform website at terraform.io and download the appropriate Terraform binary for your operating system.
Verify Installation: Open a new terminal or command prompt window and run the following command to verify that Terraform is installed correctly:
terraform --versionYou should see the Terraform version displayed in the output, indicating a successful installation.
tflocal: Terraform with LocalStack
tflocal - a small wrapper script to run Terraform against LocalStack. The tflocal command line interface can be installed using pip as shown below.
pip install terraform-local
Application Development with Terraform and LocalStack
In this section, we'll explore how to develop an application locally using Terraform and LocalStack. We'll deploy a sample AWS Lambda function that performs an addition operation on two numbers. By leveraging Terraform and LocalStack together, we can develop and test our application locally without incurring any AWS costs.
Our sample application consists of the following components:
Lambda Function: The core logic of the application resides in an AWS Lambda function. This function takes two input numbers from the Eventbridge event, adds them together, and returns the result.
EventBridge Rule: We'll use AWS EventBridge to schedule the execution of our Lambda function. We'll configure a scheduled rule in EventBridge to trigger the Lambda function every minute.
Terraform Configuration
- Create a new directory: Create a new directory on your local machine to store the Terraform configuration files for the sample application. Navigate to this directory in your terminal.
mkdir scheduler-localstack && cd scheduler-localstack
- Create the Terraform configuration files: Create a new file named
main.tfand open it in a text editor. Add the following Terraform configuration to the file:
provider "aws" {
region = "us-east-1" # Replace with your desired region
}
resource "aws_cloudwatch_event_rule" "scheduled_event" {
name = "my_scheduled_event"
description = "My scheduled event rule"
schedule_expression = "rate(1 minutes)"
is_enabled = true
}
resource "aws_cloudwatch_event_target" "lambda_target" {
rule = aws_cloudwatch_event_rule.scheduled_event.name
target_id = "my_lambda_function"
arn = aws_lambda_function.my_lambda_function.arn
input = <<JSON
{
"number1": 4,
"number2": 5
}
JSON
}
data "archive_file" "my_lambda_function_archive" {
type = "zip"
source_file = "${path.module}/code/lambda_function.py"
output_path = "my_lambda_function.zip"
}
resource "aws_lambda_function" "my_lambda_function" {
function_name = "my_lambda_function"
role = aws_iam_role.lambda_role.arn
handler = "lambda_function.lambda_handler"
runtime = "python3.8"
filename = "my_lambda_function.zip"
source_code_hash = data.archive_file.my_lambda_function_archive.output_base64sha256
}
resource "aws_lambda_permission" "allow_cloudwatch" {
statement_id = "AllowCloudWatch"
action = "lambda:InvokeFunction"
function_name = aws_lambda_function.my_lambda_function.arn
principal = "events.amazonaws.com"
source_arn = aws_cloudwatch_event_rule.scheduled_event.arn
}
resource "aws_iam_role" "lambda_role" {
name = "my_lambda_role"
assume_role_policy = <<EOF
{
"Version": "2012-10-17",
"Statement": [
{
"Sid": "",
"Effect": "Allow",
"Principal": {
"Service": "lambda.amazonaws.com"
},
"Action": "sts:AssumeRole"
}
]
}
EOF
inline_policy {
name = "cloudwatch_logs_policy"
policy = <<EOF
{
"Version": "2012-10-17",
"Statement": [
{
"Effect": "Allow",
"Action": [
"logs:CreateLogGroup",
"logs:CreateLogStream",
"logs:PutLogEvents"
],
"Resource": "*"
}
]
}
EOF
}
}
resource "aws_cloudwatch_log_group" "lambda_log_group" {
name = "/aws/lambda/${aws_lambda_function.my_lambda_function.function_name}"
}
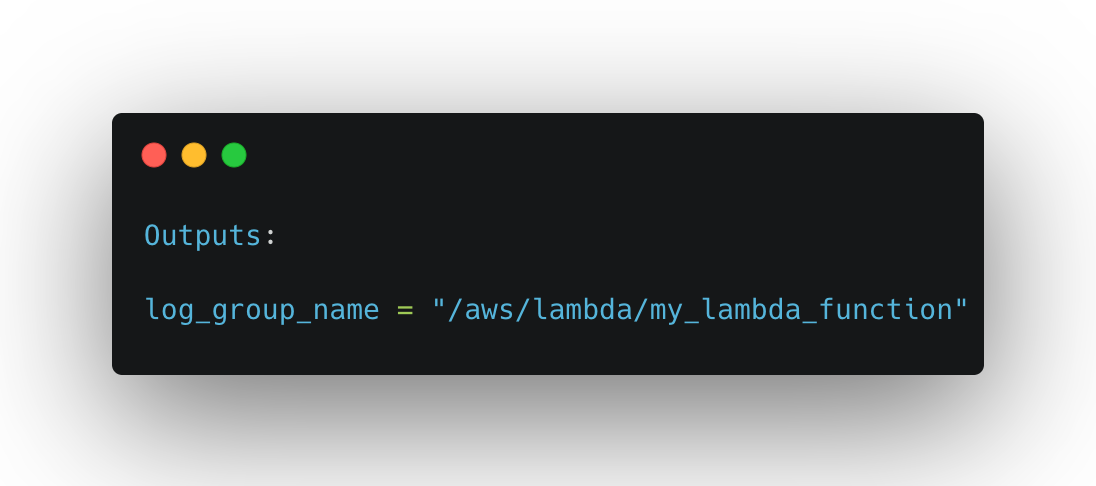
output "log_group_name" {
value = aws_cloudwatch_log_group.lambda_log_group.name
}
Below is a brief overview of the configuration:
Provider Configuration: Defines the provider configuration for AWS. The
awsthe provider is responsible for authenticating and interacting with AWS services. In this case, we specify the desired region asus-east-1.CloudWatch Event Rule: Defines an AWS CloudWatch Event Rule. The rule is used to schedule the execution of an action, in this case, our Lambda function. We provide a name and description for the rule and set the
schedule_expressionto"rate(1 minutes)", which triggers the rule every minute. Theis_enabledline will enable the rule immediately upon deployment.CloudWatch Event Target: Defines the target for the CloudWatch Event Rule. The
ruleattribute references the name of the CloudWatch Event Rule defined earlier. Thetarget_idis set to"my_lambda_function"that identify the Lambda function as the target. Thearnattribute points to the ARN (Amazon Resource Name) of the Lambda function. Theinputfield specifies the input data to be passed to the Lambda function. In this case, it's a JSON object withnumber1andnumber2as inputs.Lambda Function Code Archive: The
archive_filedata source creates a zip archive of the Lambda function code. Thesource_fileattribute specifies the path to thelambda_function.pyfile, which contains the code for the Lambda function. The resulting zip archive is namedmy_lambda_function.zipand will be used in the subsequent resource block.Lambda Function: Defines the AWS Lambda function. The
function_nameattribute specifies the name of the Lambda function. Theroleattribute references the ARN of the IAM role associated with the Lambda function. Thehandlerattribute specifies the entry point for the Lambda function code. Theruntimeattribute specifies the runtime environment for the Lambda function, in this case, Python 3.8. Thefilenameattribute specifies the name of the zip file containing the Lambda function code. Thesource_code_hashattribute references the output of thearchive_filedata source, ensuring that the Lambda function is updated when the code changes.Lambda Function Permission: Grants permission to CloudWatch Events to invoke the Lambda function. The
statement_idattribute is a unique identifier for the permission statement. Theactionattribute specifies the action that is allowed, which islambda:InvokeFunctionin this case. Thefunction_nameattribute references the ARN of the Lambda function. Theprincipalattribute specifies the entity that is granted permission, which isevents.amazonaws.comfor CloudWatch Events. Thesource_arnattribute references the ARN of the CloudWatch Event Rule.IAM Role for Lambda: Defines an IAM role for the Lambda function. The
nameattribute specifies the name of the role. Theassume_role_policyattribute defines the trust relationship policy document, allowing the Lambda service to assume this role. Theinline_policyblock defines an inline IAM policy attached to the role. In this case, it grants permissions for CloudWatch Logs to create log groups, create log streams, and put log events.AWS CloudWatch Log Group: Creates an AWS CloudWatch Log Group for the Lambda function. The name attribute is set using an interpolated string,
"/aws/lambda/${aws_lambda_function.my_lambda_function.function_name}"which represents the desired naming convention for the log group. It includes the function name of the AWS Lambda function.Terraform Output: output block defines an output variable named
log_group_namethat displays the name of the AWS CloudWatch Log Group created for the Lambda function. The value is set asaws_cloudwatch_log_group.lambda_log_group.name, which retrieves the name attribute of theaws_cloudwatch_log_groupresource.
Lambda Function:
The core functionality of our application is implemented using an AWS Lambda function. The lambda function is responsible for processing the input event, performing the desired computation, and returning the result. The lambda function, located at the root of our project under the code folder, contains the following code:
import boto3
import json

def lambda_handler(event, context):
    print("Lambda Function Name: ", context.function_name)
    print("Event is: ", event)
    number1 = event["number1"]
    number2 = event["number2"]

    result = number1 + number2

    print("Sum:", result)

    return {"statusCode": 200, "body": json.dumps({"result": result})}
The lambda function is written in Python and consists of a single handler function named lambda_handler. This function is automatically invoked by AWS Lambda when an event triggers its execution.
Upon invocation, the function receives two parameters: event and context. The event parameter contains the input data passed to the lambda function, while the context parameter provides information about the execution context and runtime environment.
In our lambda function, we first print the name of the lambda function using context.function_name and the input event using event. This allows us to verify the function execution logs and ensure the correct inputs are received.
Next, we extract the values of number1 and number2 from the event payload. These values represent the numbers to be added together.
The lambda function performs the addition operation and stores the result in the result variable.
We then print the calculated sum using print("Sum:", result). This line helps us verify that the computation was successful and the expected result is obtained.
Finally, we construct a JSON response with a status code of 200 and a body containing the calculated result.
The lambda function encapsulates the business logic of our application and is executed by LocalStack in response to the scheduled event defined earlier in the Terraform configuration.
Deploying the Infrastructure with Terraform and LocalStack
Now that we have our Terraform configuration file ready, let's deploy the infrastructure using Terraform and LocalStack. Follow the steps below:
Open your command line interface (CLI) or terminal.
Navigate to the directory where you have saved the Terraform configuration file.
Initialize the Terraform working directory by running the following command:
tflocal initThis command initializes the working directory and downloads the necessary provider plugins defined in your Terraform configuration.
Once the initialization is complete, you can run the following command to deploy the infrastructure:
tflocal applyTerraform will read the configuration file, create the necessary resources, and prompt you to confirm the execution. Type
yesand press Enter to proceed.Terraform will start provisioning the infrastructure components specified in the configuration file. It will create the CloudWatch Event Rule, Lambda function, IAM role, and associated permissions.
Once the command is executed, the
log_group_nameoutput variable will be displayed, which contains the name of the AWS CloudWatch Log Group associated with the Lambda function. This output value can be noted down and used to verify the application's behavior and inspect the logs generated by the Lambda function in the next section.
Verifying the Application
To ensure a seamless verification process of the application, let's begin by installing the awslocal command-line tool. awslocal is a utility that is a thin wrapper around the aws command line interface for use with LocalStack.
To install awslocal, follow the steps below:
Open your command-line interface and execute the following command to install awslocal using pip:
pip install awscli-local
This command will download and install the awslocal package. With awslocal installed, we are now ready to proceed with the verification of our application.
Now that we have deployed our infrastructure using Terraform and LocalStack, let's verify the application by checking the result printed by the Lambda function.
Open your command line interface (CLI) or terminal.
Make sure that LocalStack is still running and that the necessary AWS services are emulated.
Use the AWS CLI to check the logs generated by the Lambda function. Run the following command:
awslocal --endpoint-url=http://localhost:4566 logs describe-log-groupsWe get the output as shown below
  {
      "logGroups": [
          {
              "logGroupName": "/aws/lambda/my_lambda_function",
              "creationTime": 1685365365216,
              "metricFilterCount": 0,
              "arn": "arn:aws:logs:us-east-1:000000000000:log-group:/aws/lambda/my_lambda_function:*",
              "storedBytes": 7639
          }
      ]
  }
This command will list all the log groups available in LocalStack.
Identify the log group associated with the Lambda function. It should have a name similar to
my_lambda_function. Note the name of the log group for the next step.Fetch the logs for the Lambda function by running the following command:
awslocal --endpoint-url=http://localhost:4566 logs filter-log-events --log-group-name /aws/lambda/my_lambda_function
The command will display the log events generated by the Lambda function. Look for the log entry that includes the result of the addition.
 {
            "logStreamName": "2023/05/29/[$LATEST]0a013874ae1b00b65f24f5930a8da077",
            "timestamp": 1685366855633,
            "message": "START RequestId: 8acdc34d-f5cb-4f30-97d2-97522f0d22dc Version: $LATEST",
            "ingestionTime": 1685366855727,
            "eventId": "144"
        },
        {
            "logStreamName": "2023/05/29/[$LATEST]0a013874ae1b00b65f24f5930a8da077",
            "timestamp": 1685366855644,
            "message": "Lambda Function Name:  my_lambda_function",
            "ingestionTime": 1685366855727,
            "eventId": "145"
        },
        {
            "logStreamName": "2023/05/29/[$LATEST]0a013874ae1b00b65f24f5930a8da077",
            "timestamp": 1685366855656,
            "message": "Event is:  {'number1': 4, 'number2': 5}",
            "ingestionTime": 1685366855727,
            "eventId": "146"
        },
        {
            "logStreamName": "2023/05/29/[$LATEST]0a013874ae1b00b65f24f5930a8da077",
            "timestamp": 1685366855668,
            "message": "Sum: 9",
            "ingestionTime": 1685366855727,
            "eventId": "147"
        }
The log events show the following details:
The start of the Lambda function execution with a unique RequestId and the corresponding version.
Confirmation of the Lambda function name, which in this case is
my_lambda_function.The event data is passed to the Lambda function, which is a dictionary containing the numbers
4and5.The result of the computation, which is the sum of the numbers
4and5, equaling9.
These log events demonstrate that the Lambda function was executed successfully and performed the expected computation. By inspecting the log events, we can confirm that the application is functioning correctly and producing the desired outcome.
Conclusion
In conclusion, LocalStack combined with Terraform provides a powerful solution for developing and testing AWS-based applications locally. With LocalStack, developers can emulate various AWS services, allowing them to build and test their infrastructure and applications without incurring any costs or dependencies on the actual AWS cloud environment. Terraform complements LocalStack by enabling infrastructure-as-code, making it easy to manage and provision AWS resources.
Throughout this blog, we explored the installation and setup of LocalStack, starting and configuring it to emulate AWS services. We also delved into developing infrastructure using Terraform, guiding readers through the process of installation, writing Terraform configuration files, and deploying resources. By combining Terraform with LocalStack, developers can create, manage, and provision AWS resources in a consistent and repeatable manner.
Furthermore, we examined a sample application deployment using Terraform and LocalStack, showcasing how to deploy a Lambda function triggered by a scheduled event. This practical example highlighted the seamless integration between LocalStack, Terraform, and the AWS services they emulate, providing a comprehensive local development and testing environment.
Finally, we verified the application's functionality by inspecting the log events generated by the deployed Lambda function. By filtering the log events, we observed the successful execution of the Lambda function, along with the input event data and the expected result.
In summary, LocalStack and Terraform offer a compelling combination for local AWS development and testing, enabling developers to build, deploy, and validate AWS infrastructure and applications efficiently. Incorporating these tools into your development workflow can significantly enhance productivity and accelerate the delivery of reliable and robust AWS solutions.
At the end of this blog, if you're interested in exploring a practical implementation of the concepts discussed, you can refer to the scheduler-localstack GitHub project. This project provides a code reference and example infrastructure setup using Terraform and LocalStack for developing and testing AWS Lambda functions locally.